Users who are able to see your resource do not necessarily have access to it. There are multiple ways to grant access as well as different options on how users can use your resource.
¶ Direct access
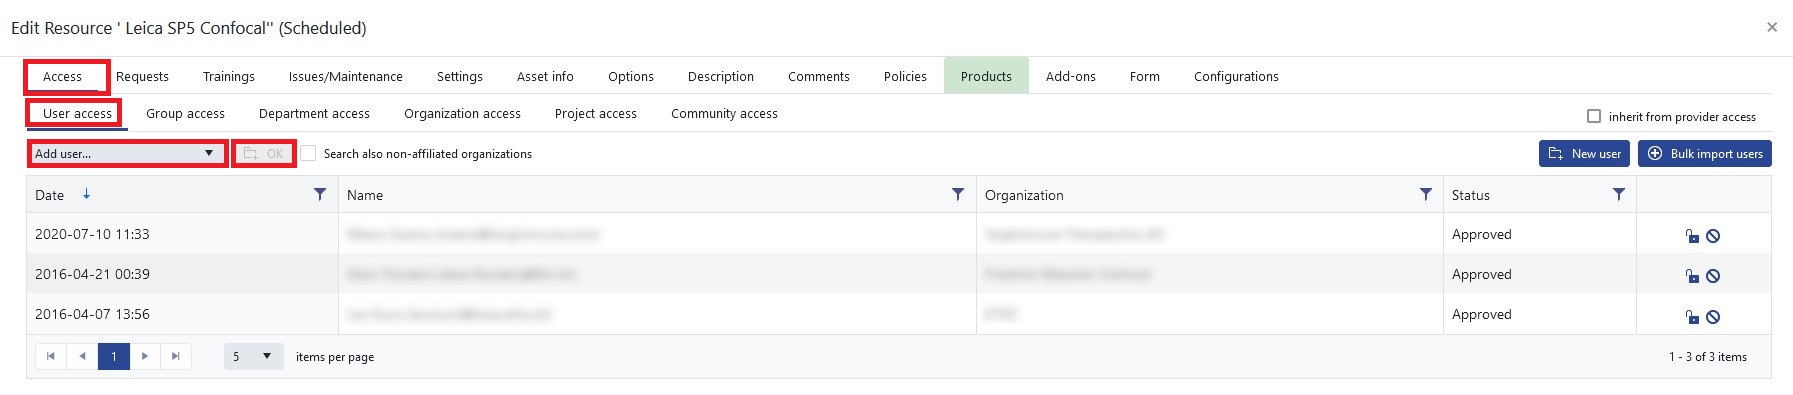
Direct access can be granted to individual users in the Access tab of the resource management window. By clicking on the Add user drop-down search field and either choose one of the proposed users or enter the email address of the user, that should be added. After selecting one, click on the Add user button that is to the right of the search field.
 |
|---|
| User access |
There are also options to add new users, search for users from non-affiliated organizations and to bulk import users. This allows you to grant access to users who do not have an OpenIRIS account. It is also possible for users with no provider access to get direct access to a resource. If this option has been set up, then this will be the only visible and accessible resource from your provider.
You can grant access to whole groups, departments, organizations, projects and communities by repeating the same steps under the respective tab.
It is also possible to inherit the permissions from the provider-access-settings by ticking the box next to inherit from provider access under the access tab. If this option has been applied, all access tabs become gray and cannot be selected individually.
 |
|---|
| Inherited user access |
¶ Access request
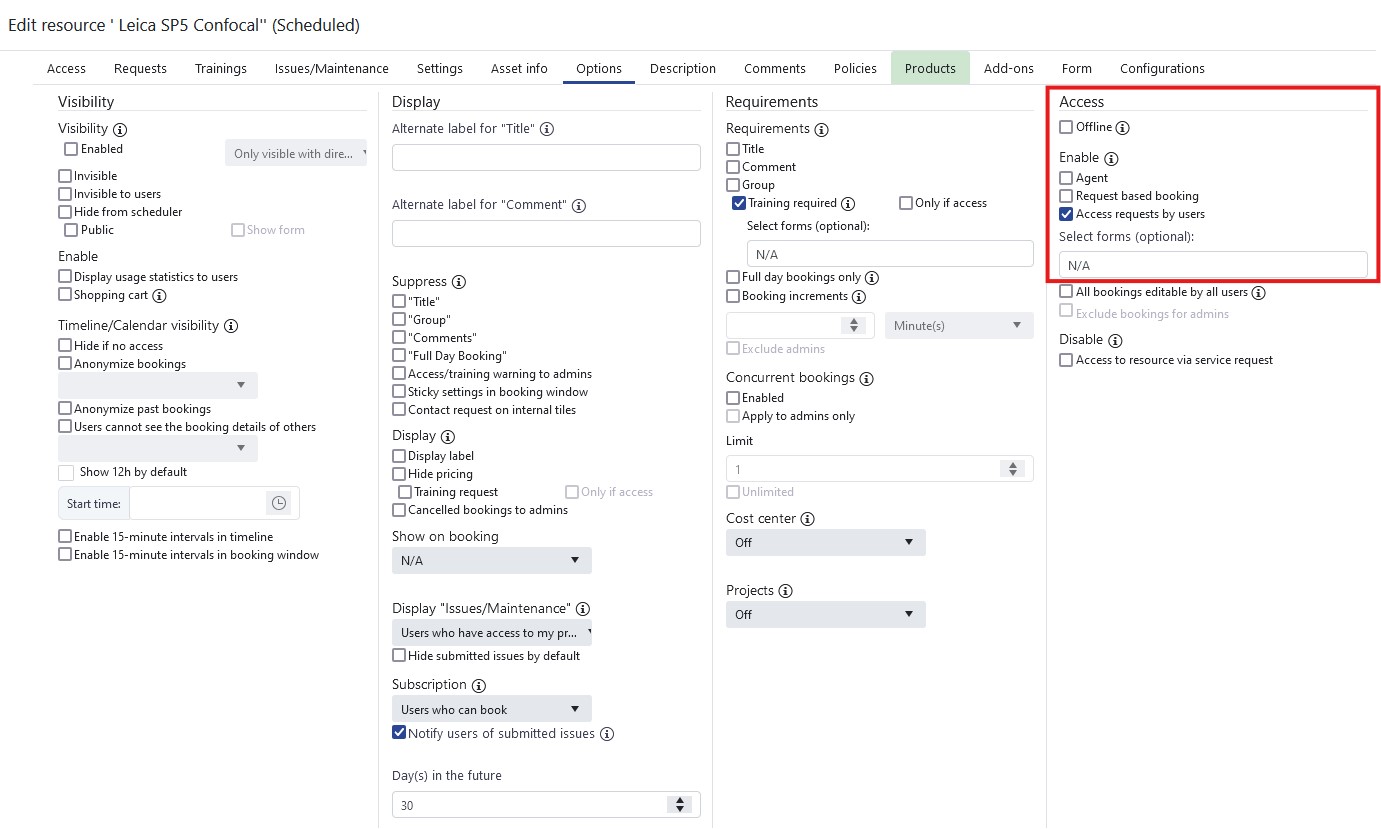
In the Options tab it is also possible to enable Access request by users by ticking the respective box. This allows users who do not have access to the resource to send you an access request for your resource. Instructions on how they are able to do this can be found here. Here you also have the option to select a form to add to the access request.
 |
|---|
| Access request |
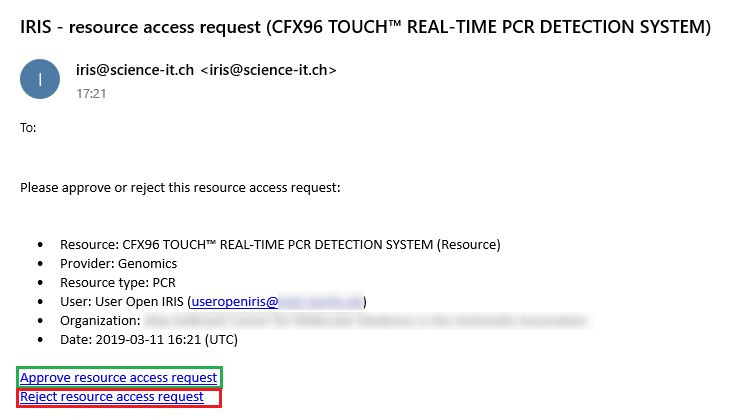
After a request has been submitted, you will be informed by an email. At the end of the mail you will find links to directly approve or reject this request.
 |
|---|
| Access request e-mail |
You can also answer requests under Admin > Inbox by clicking on the gear icon (). Here you can also edit all previous requests and change their status.
 |
|---|
| Admin inbox |
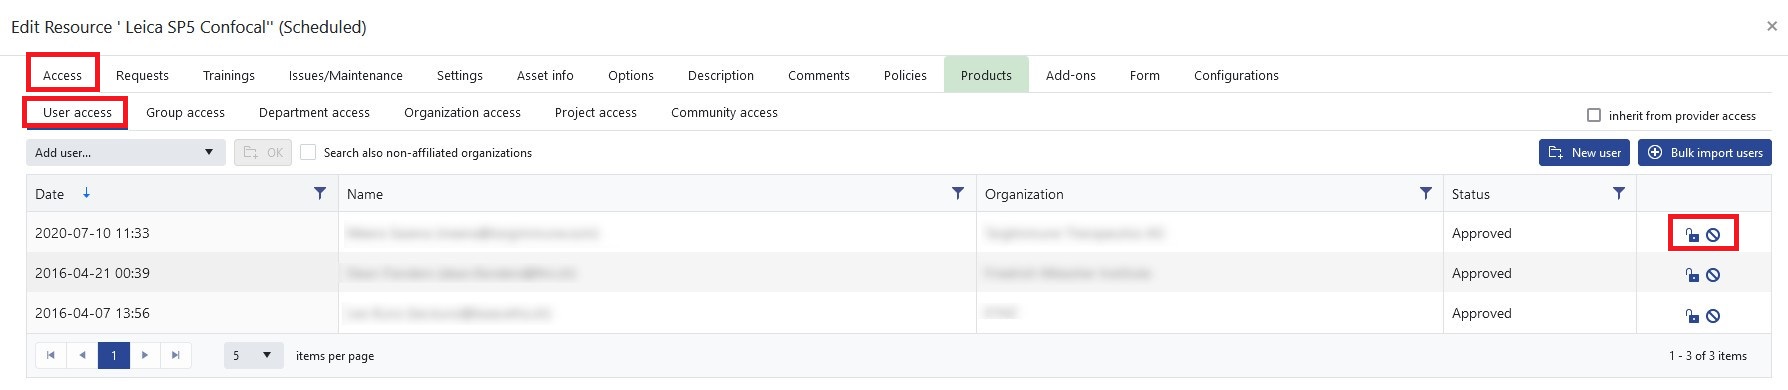
In OpenIRIS you are also able to answer requests under the Access tab in the Edit Resource window. Here you will find all requests marked in red. On the very right side of a request you can either accept the request by clicking on the lock symbol () or reject it by clicking on the arrow symbol. The user that sent the request will automatically be informed.
 |
|---|
| User access tab |
¶ Administrate access of users
All users who have access to the resource can be administered in the Access tab of the resource. By clicking on the symbol with the open lock you can disable the access of the user to this resource. The user will still remain in this list and can always be re-enabled to use the resource. By clicking on the cancel icon you can remove this user completely from using your resource. The user will then no longer appear in the list. However, the user can (if the option is enabled) still send access requests for this resource in the future.
 |
|---|
| User Access |
¶ Access via service requests
Providers can also give access to resources to service requests. As an exmple, a provider for scientific equipment (e.g. microscopes) could setup a servicecalled "Equipment access". A new user then has to submit service request and fill in a form designed by the provider admin describing his or her scientific project. Afterwards the needs of the user can be evaluated and the according resources (e.g. confocal microscopes) can be added to the service request. As soon as the service request is set to active, the user will be able to book these resources. Once the project is finalized, the original service request can be set to "closed" by the provider admin and the user will not be able to book the linked resources any more.
This option is not restricted to scheduled resources, but can also be used to gain access to addtional services such as sample preparation etc.
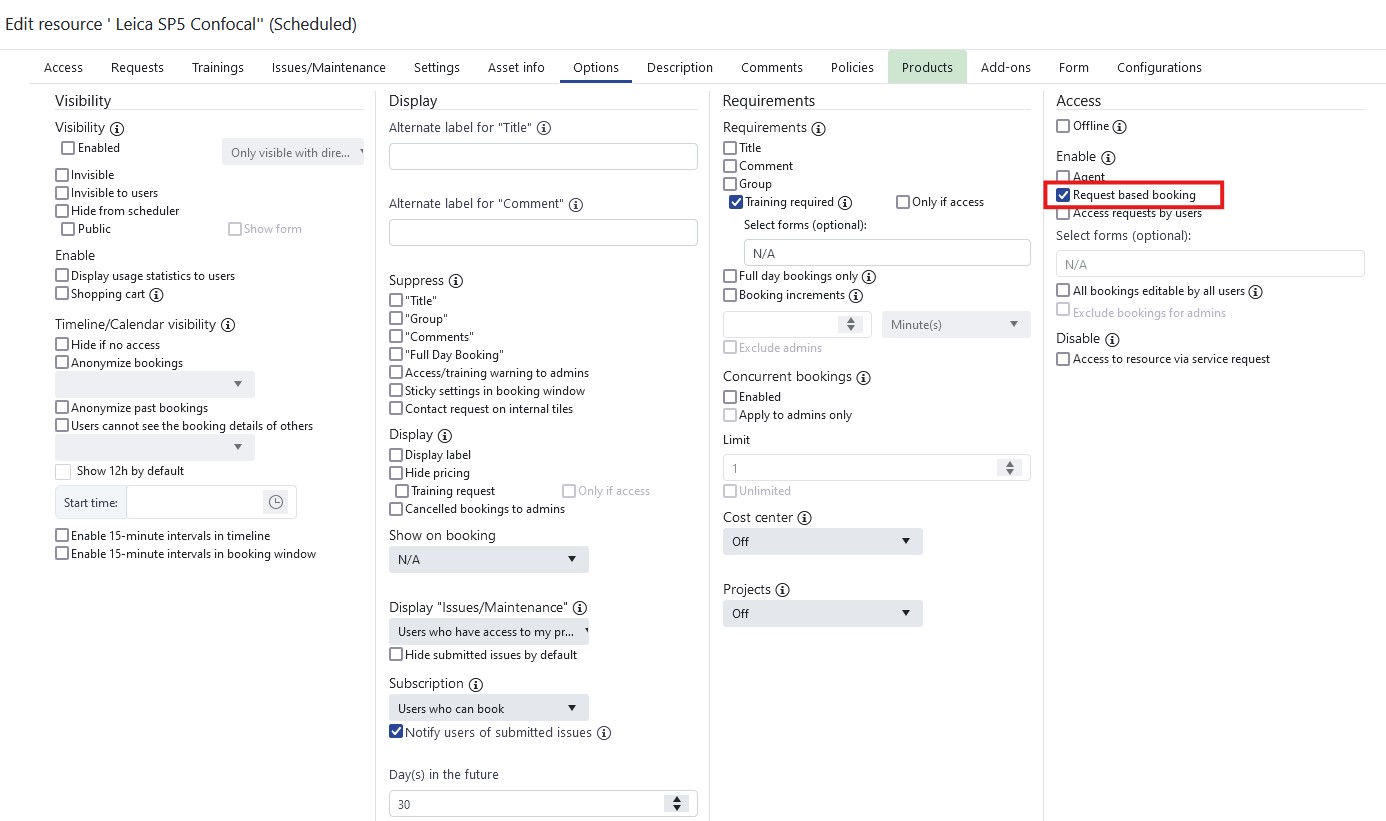
To make use of this option you need to enable Request based booking in the Options tab. Please keep in mind, that users with direct access to your resource will not need a request to make bookings.
 |
|---|
| Request based booking |
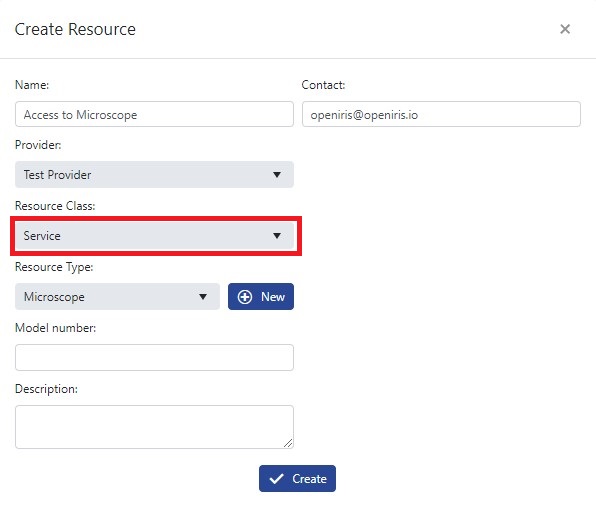
Additionally, a new service needs to be created over which the requests are inquired.
In the following example the request based booking is enabled for a microscope.
 |
|---|
| Creating a service |
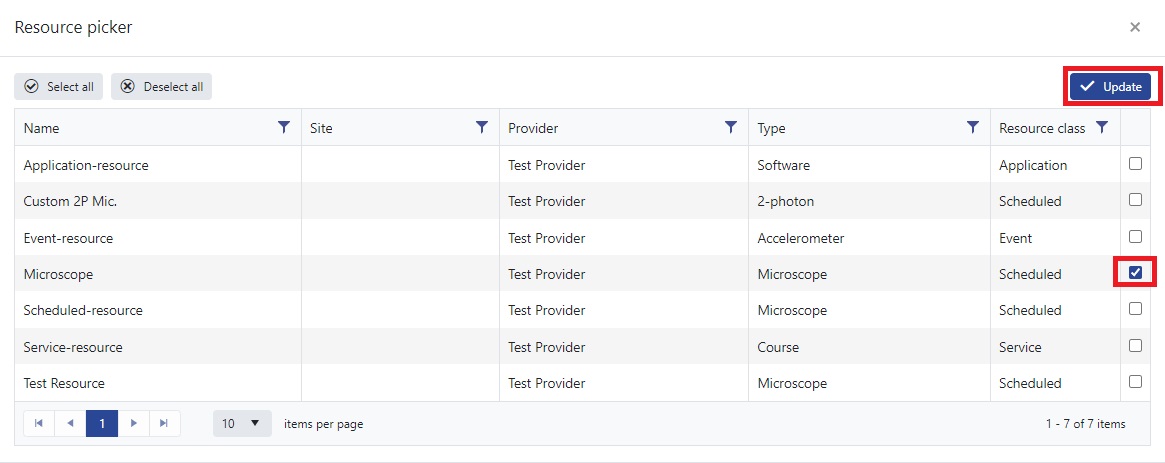
This service needs some additional settings to function as a service request for one or multiple resources. First of all, the corresponding resources need to be added to the service. This can be done in the Resources tab of the service settings. When clicking on Select Resource(s) all resources for whom you are an admin are showed. Now you can select and deselect as many as you want. But do not forget to click Update in the end.
 |
|---|
| Adding a resource to a service |
 |
|---|
| Selection of resource |
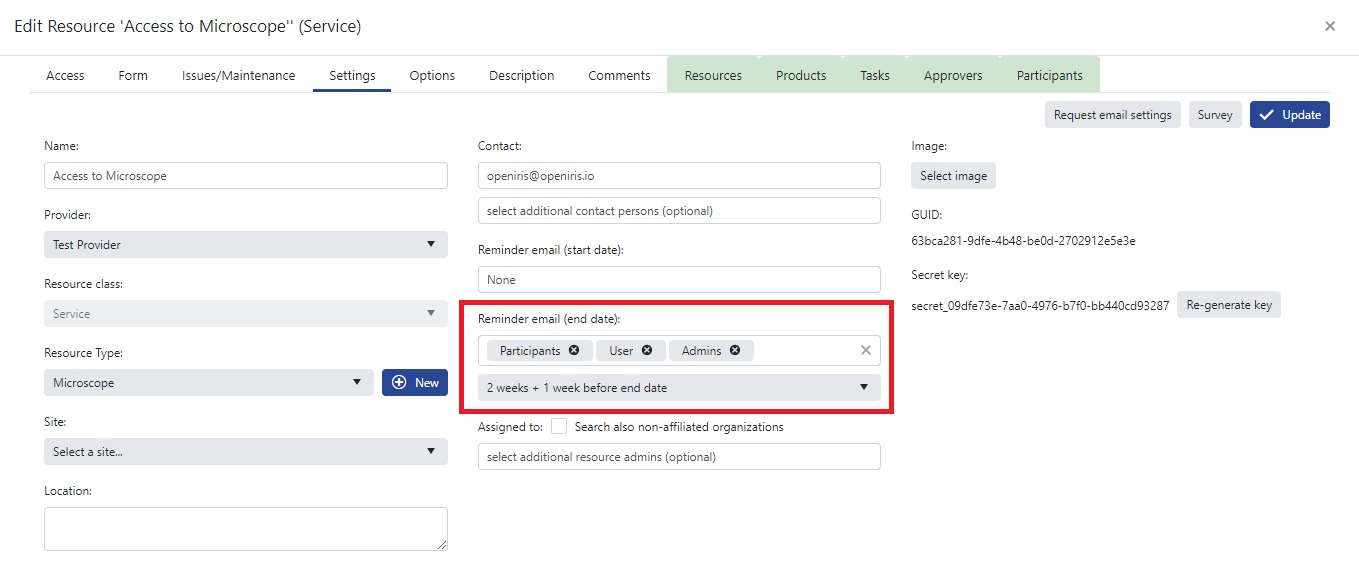
Additionally, you can display the start and end date of this request in the Options tab of the service settings. Then you can set the default duration of a request and when the request should be closed if no extension was made. In the Settings tab it is possible to enable reminder emails for the start or/and the end date.
 |
|---|
| Default request duration |
 |
|---|
| Reminder settings |
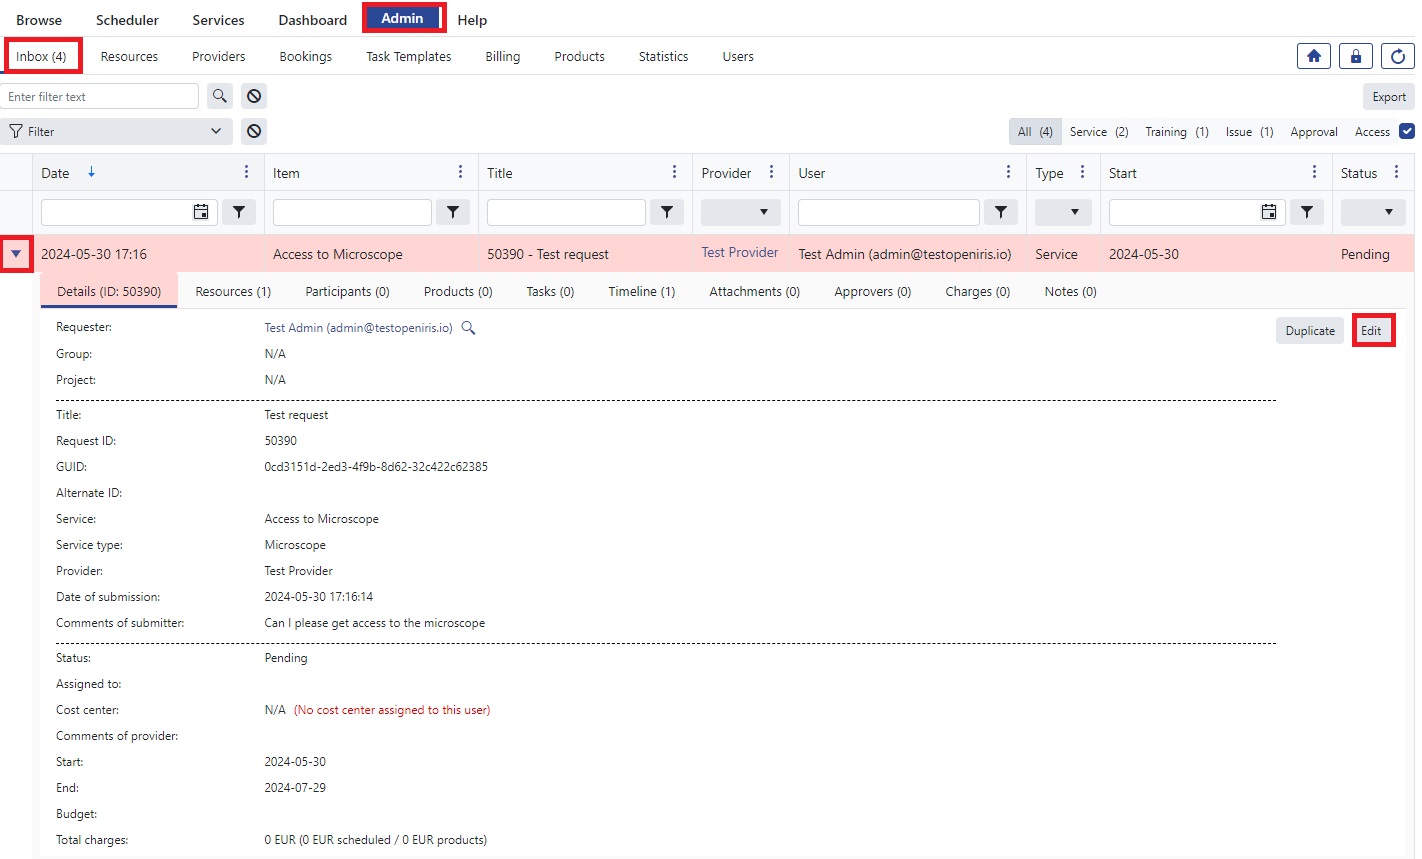
Now everybody who has access to the service can send a request for your resource. If a request is send you will be informed by email. Now this user is visible in [Admin > Inbox] (marked in red as the status is still pending). By clicking on the little triangle more options become visible. You can now make bookings for this user and change the settings and status for his request. If the status is changed, the user will be informed automatically by email.
 |
|---|
| Edit a request |
If you want to get additional information from the users, you can add a form for the service in the Form tab. This form will then be shown to every user who wants to send a request. The request can only be send if all required fields are filled out. Please keep in mind that this does not change anything for the users who have already send a request. To read more on how to create a form click here.