This page provides instructions on how to create resources, assign them to providers, and import resource data in bulk, as well as categorize resources by type and class to meet various organizational needs.
Related topics:
Resource configuration
Provider visibility
¶ Create a new resource
A new resource can be created by a portal administrator, a organization administrator or a provider administrator. Keep in mind that each resource must be assigned to a provider, so make sure that the provider is created first. If you need to create a provider, please have a look at this page.
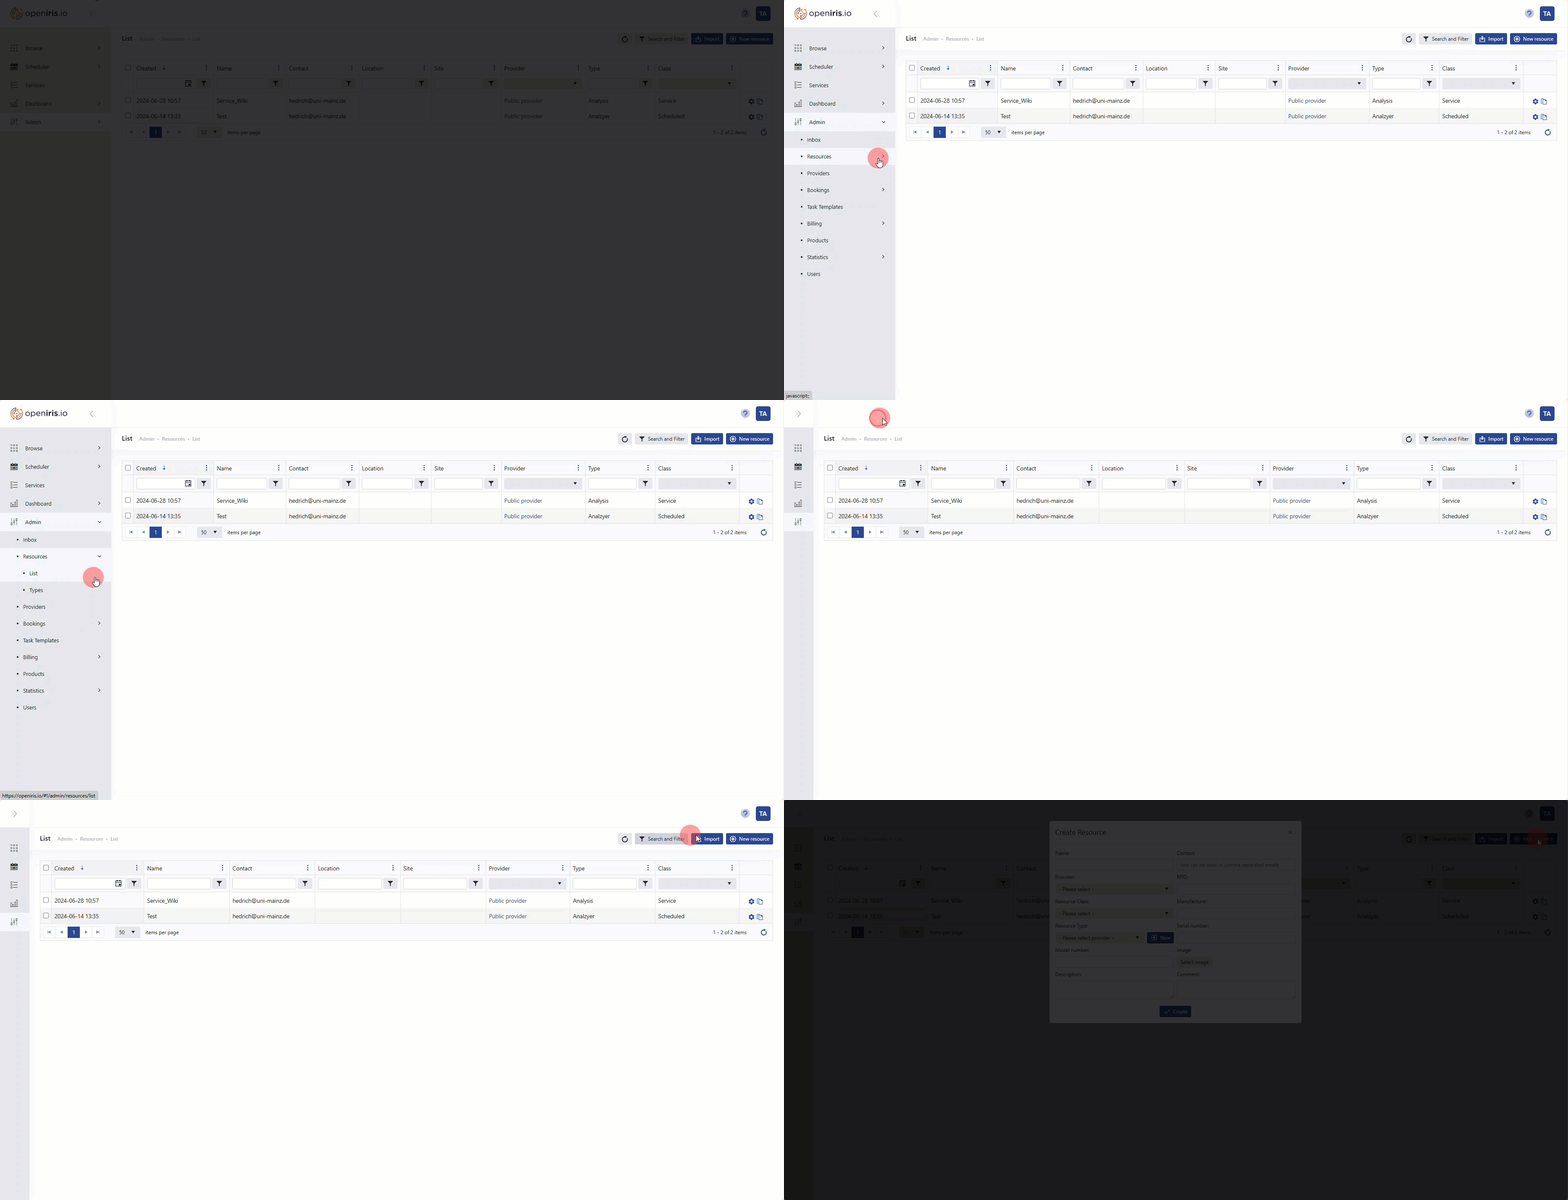
To create a new resource click on Admin > Resources > List > New Resource
 |
|---|
How to open the create resource window |
Portal administrators can disable the button
New Resourcein the portal settings. But up-to-date (05/16/2024) this only disables the button found atBrowse>Resource>New Resource.
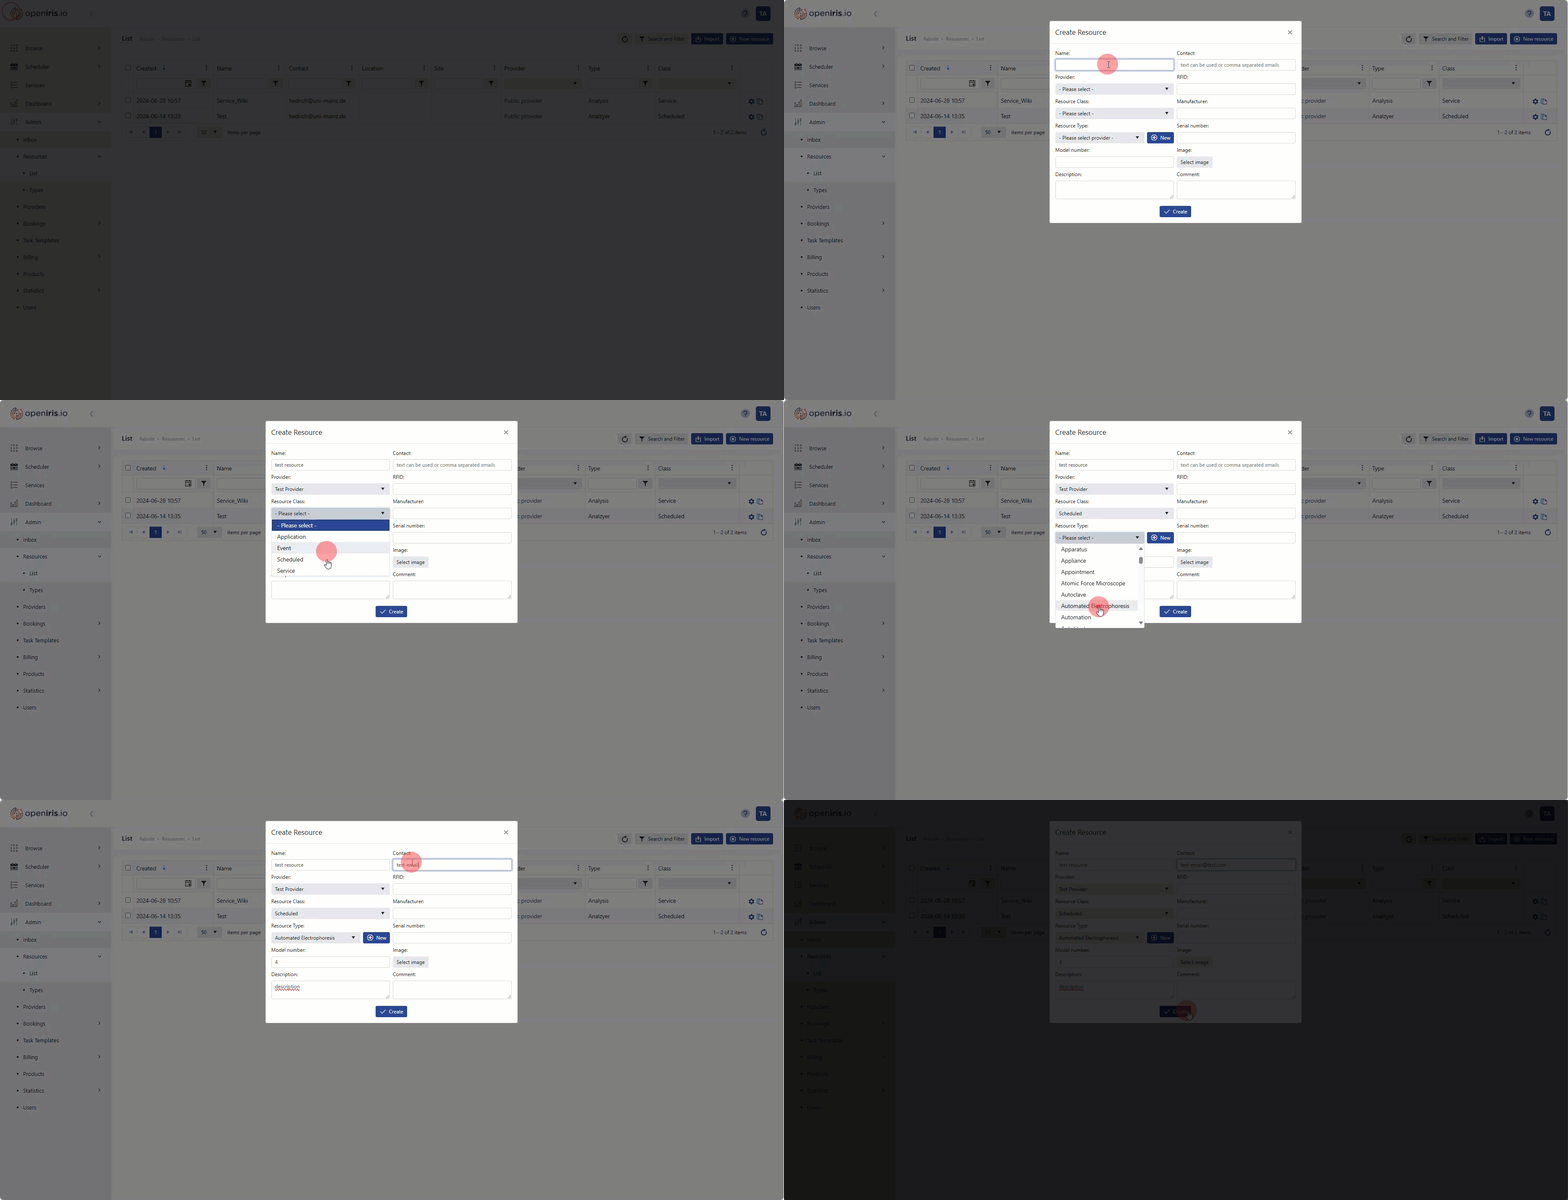
Upon clicking on New resource a new window will open. Mandatory information to create a new resource includes the Name, Provider, Description and Contact of your resource as well as a resource type and resource class. The different resource classes are tuned for different use cases:
-
Application: This can be used to describe applications of interest to your provider. It primarily is useful for providing a link and useful information about the application. However, it can be also be used to describe software that is available for location installation (e.g. download information) or software available on servers/workstations.
-
Scheduled: This is intended for instruments or shared equipment as well as rooms or other shared resources.
-
Scheduled(Add-on): This is typically used to describe an add-on to a scheduled resource e.g microscope objective, room, projector, etc.
-
Service: This is for services that can be requested and allows service request creation via dynamic forms and an inbox to track progress or billing.
The resource-type categorizes your new resource. There is a defined list of resource types (found here: Admin > Resources > Topic (drop-down) > Resource types). More resource types can be added but it is recommended to try and fit it into the list of existing resource types.
The Create button will add the resource while the Close button will close the window without saving any information.
 |
|---|
| mandatory information to create a new resource |
¶ Create a new resource with an import
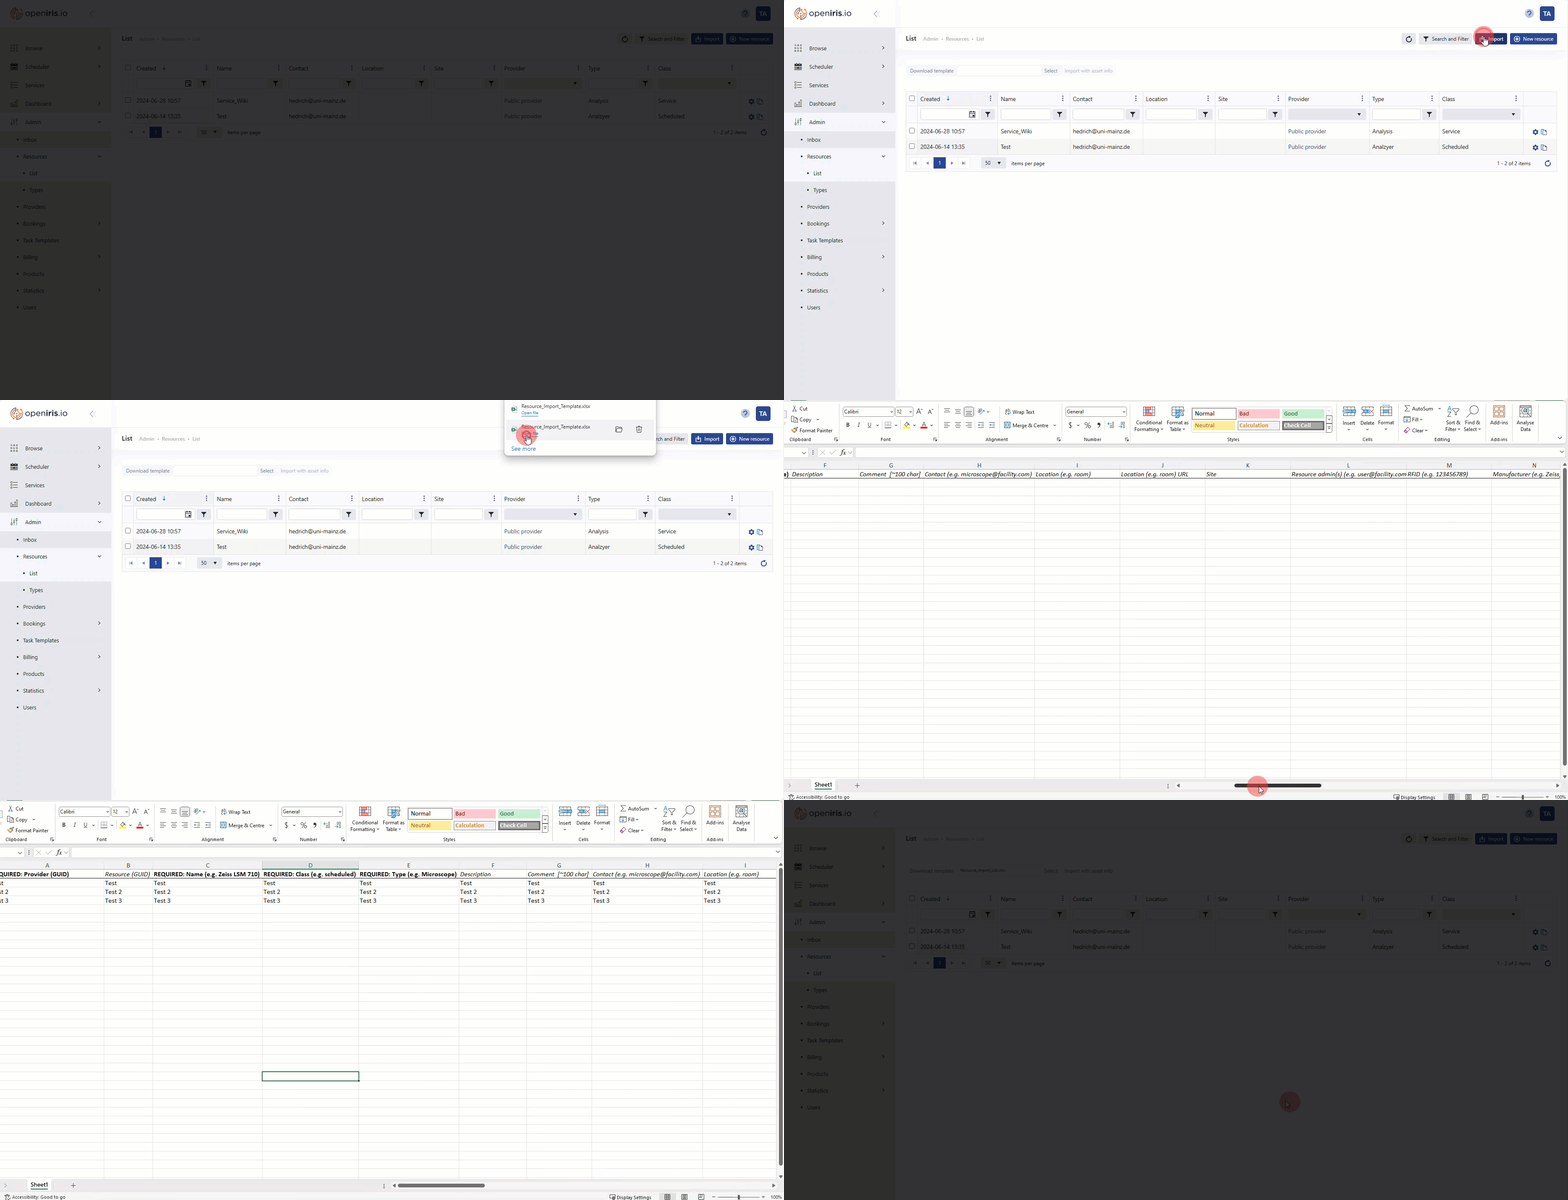
At Admin > Resources > resource list > Import you can start a bulk import of resources to a selected provider from a CSV with a comma or semicolon as separator. The following format is required (bold items are mandatory): name; class; type; description; comment; contact; location; RFID; manufacturer; serial number; model number. The import window looks like this:
 |
|---|
| How to start the bulk import of resources |